
Merchant and Mills mania!
A short preface about sewing confidence (skip to next section if this is a bit TLDR)
A short divergence into my struggles with sewing. I've been collecting (slowly) sewing inspo books for some time, and trying to find ones with patterns that I thought I would actually MAKE. Merchant and Mills books (like this one and this one) were always on the list. Not only for their patterns, but for the design, the layout, the simplicity, the approach. I just love looking through them! But I hadn't dared to really make one until...
Remember that trip up to BC with my dear friend and colleague? My husband, who accompanied us, encouraged me to buy a Merchant and Mills The Dress Shirt pattern as I sat in a beautiful store on Granville Island and tortured myself over spending more money when I might not make anything. (You can shop online for Merchant and Mills things on their website, too: https://maiwa.com/collections/merchant-mills)

Photo courtesy of Maiwa Supply blog: http://maiwahandprints.blogspot.com/2016/09/
And then I just did it. I bought it. A week or so later, I sat and cut out the pattern one evening as a something to do that wasn't actually testing my sewing skills. And a week or so ago, over my Christmas-New Year's break, I just marched into Pacific Fabrics and bought some amazing cotton chambray. And the next day (after throwing it in the washer and dryer) I cut the pattern out, and began to sew. I finished it over a day and half, and loved every. Single. Minute. Weird!
So what flipped the switch? Well, much like Sanae Ishida's book Sewing Happiness, the Love to Sew podcast has really inspired me to water and feed my sewing habit, to value the worth of making in my life, and to honor my own talent, interest, and ability.
I think more than any other piece of the making journey, having two ladies talking to me every morning (I listen to it on the way into work) about sewing ups and downs, their lives, and their passion has given my a sense of belonging and acceptance that I've never had in a hobby.
The journey to sewing confidence is long and circuitous, and knowing other people who love it and do it really helps in a magical way that's hard to explain, especially for me, an autodidactic introvert. Seriously, check out Love to Sew if you want to hang with two sewing geeks who are adorable.

The Dress Shirt, image courtesy of Merchant and Mills (http://merchantandmills.com/store/patterns/the-dress-shirt/
The actual project
First off, I love Merchant and Mills, as I said above (but you may have skipped) but I've always worried that the rather boxy patterns might not flatter me. I'm not tiny, and I tend to look to things that accentuate that I have a waist because otherwise it can get a bit lost and I feel like a pair of shoulders directly connected to generous hips. Despite this, alongside my making confidence I've been working to build more BODY confidence and/or body love/appreciation/adoration/acceptance/tolerance/managed despair depending on the day, and the success of my velvet dress really inspired me to branch out and try the rather boxy The Shirt Dress pattern.
Fabric selection
Merchant and Mills has a very clean and simple look, inspired (it looks to me) by sixties factory fashion and menswear. It's super cool, and I love the feeling of effortless smarts it gives off.
If you wear this stuff, you obviously are intelligent and probably wear a lot of handsome brogues and perhaps own a vintage VW bug and travel around eating only locally sourced meats while also writing about your experience for yourself and not to be shared with anyone because you're just so confident you don't NEED anybody to read it. (Let's be clear - this is not me.)
Needless to say, this kind of coolness calls for a matching level of fabric quality.
Disappointed that the adored Nancy's Sewing Basket on Queen Anne has closed (WHY?!) I went to my second-favorite fabric store, Pacific Fabrics in Northgate. And I found a truly lovely, simple, soft cotton chambray (like the one pictured) that always looks a little unfinished, so that wrinkles - which for me are inevitable and a part of life - will look like a part of the whole thing.
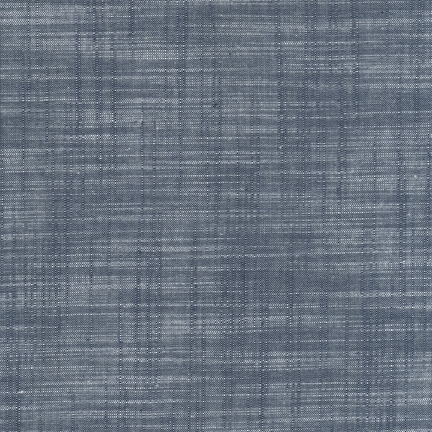
Chambray Union Cross Indigo; I think I bought something slightly different, but it's pretty close!
The cut
Not surprisingly, the chambray was a dream to cut out, so cutting was no issue.
TIP: One thing I've been trying if I have a yoke pair to cut out, or something else that really has to match up to ensure a good sew up, is to cut one piece and then use it as the template for the second piece, then make sure that they really do match up with a final critical eye. This, with the same seam allowance used, should help ensure that things go smoothly. In this case, I'm happy to report that they did! But more of that later.
The sew up
One begins this sew up with one of the hardest part first: fitting the yoke to the front panel. This entails matching outside curves, which, as any quilter knows, isn't the easiest thing in the world. I used my old friend: (over?)pinning to help me ensure that all went swimmingly. Even so, I still had a few tucks where the fabric of the front panel had folded while I sewed. I wished very much that I had pinned the PANEL side so I could better control it. This is in general a lesson that I've started to learn - there are strategic decisions to be made about which side to sew on.
After I sewed up the front yoke, I also pinned a bit to do the topstitching and ensure that the seam allowance on the inside was neatly sewn down by the beautiful topstitching.

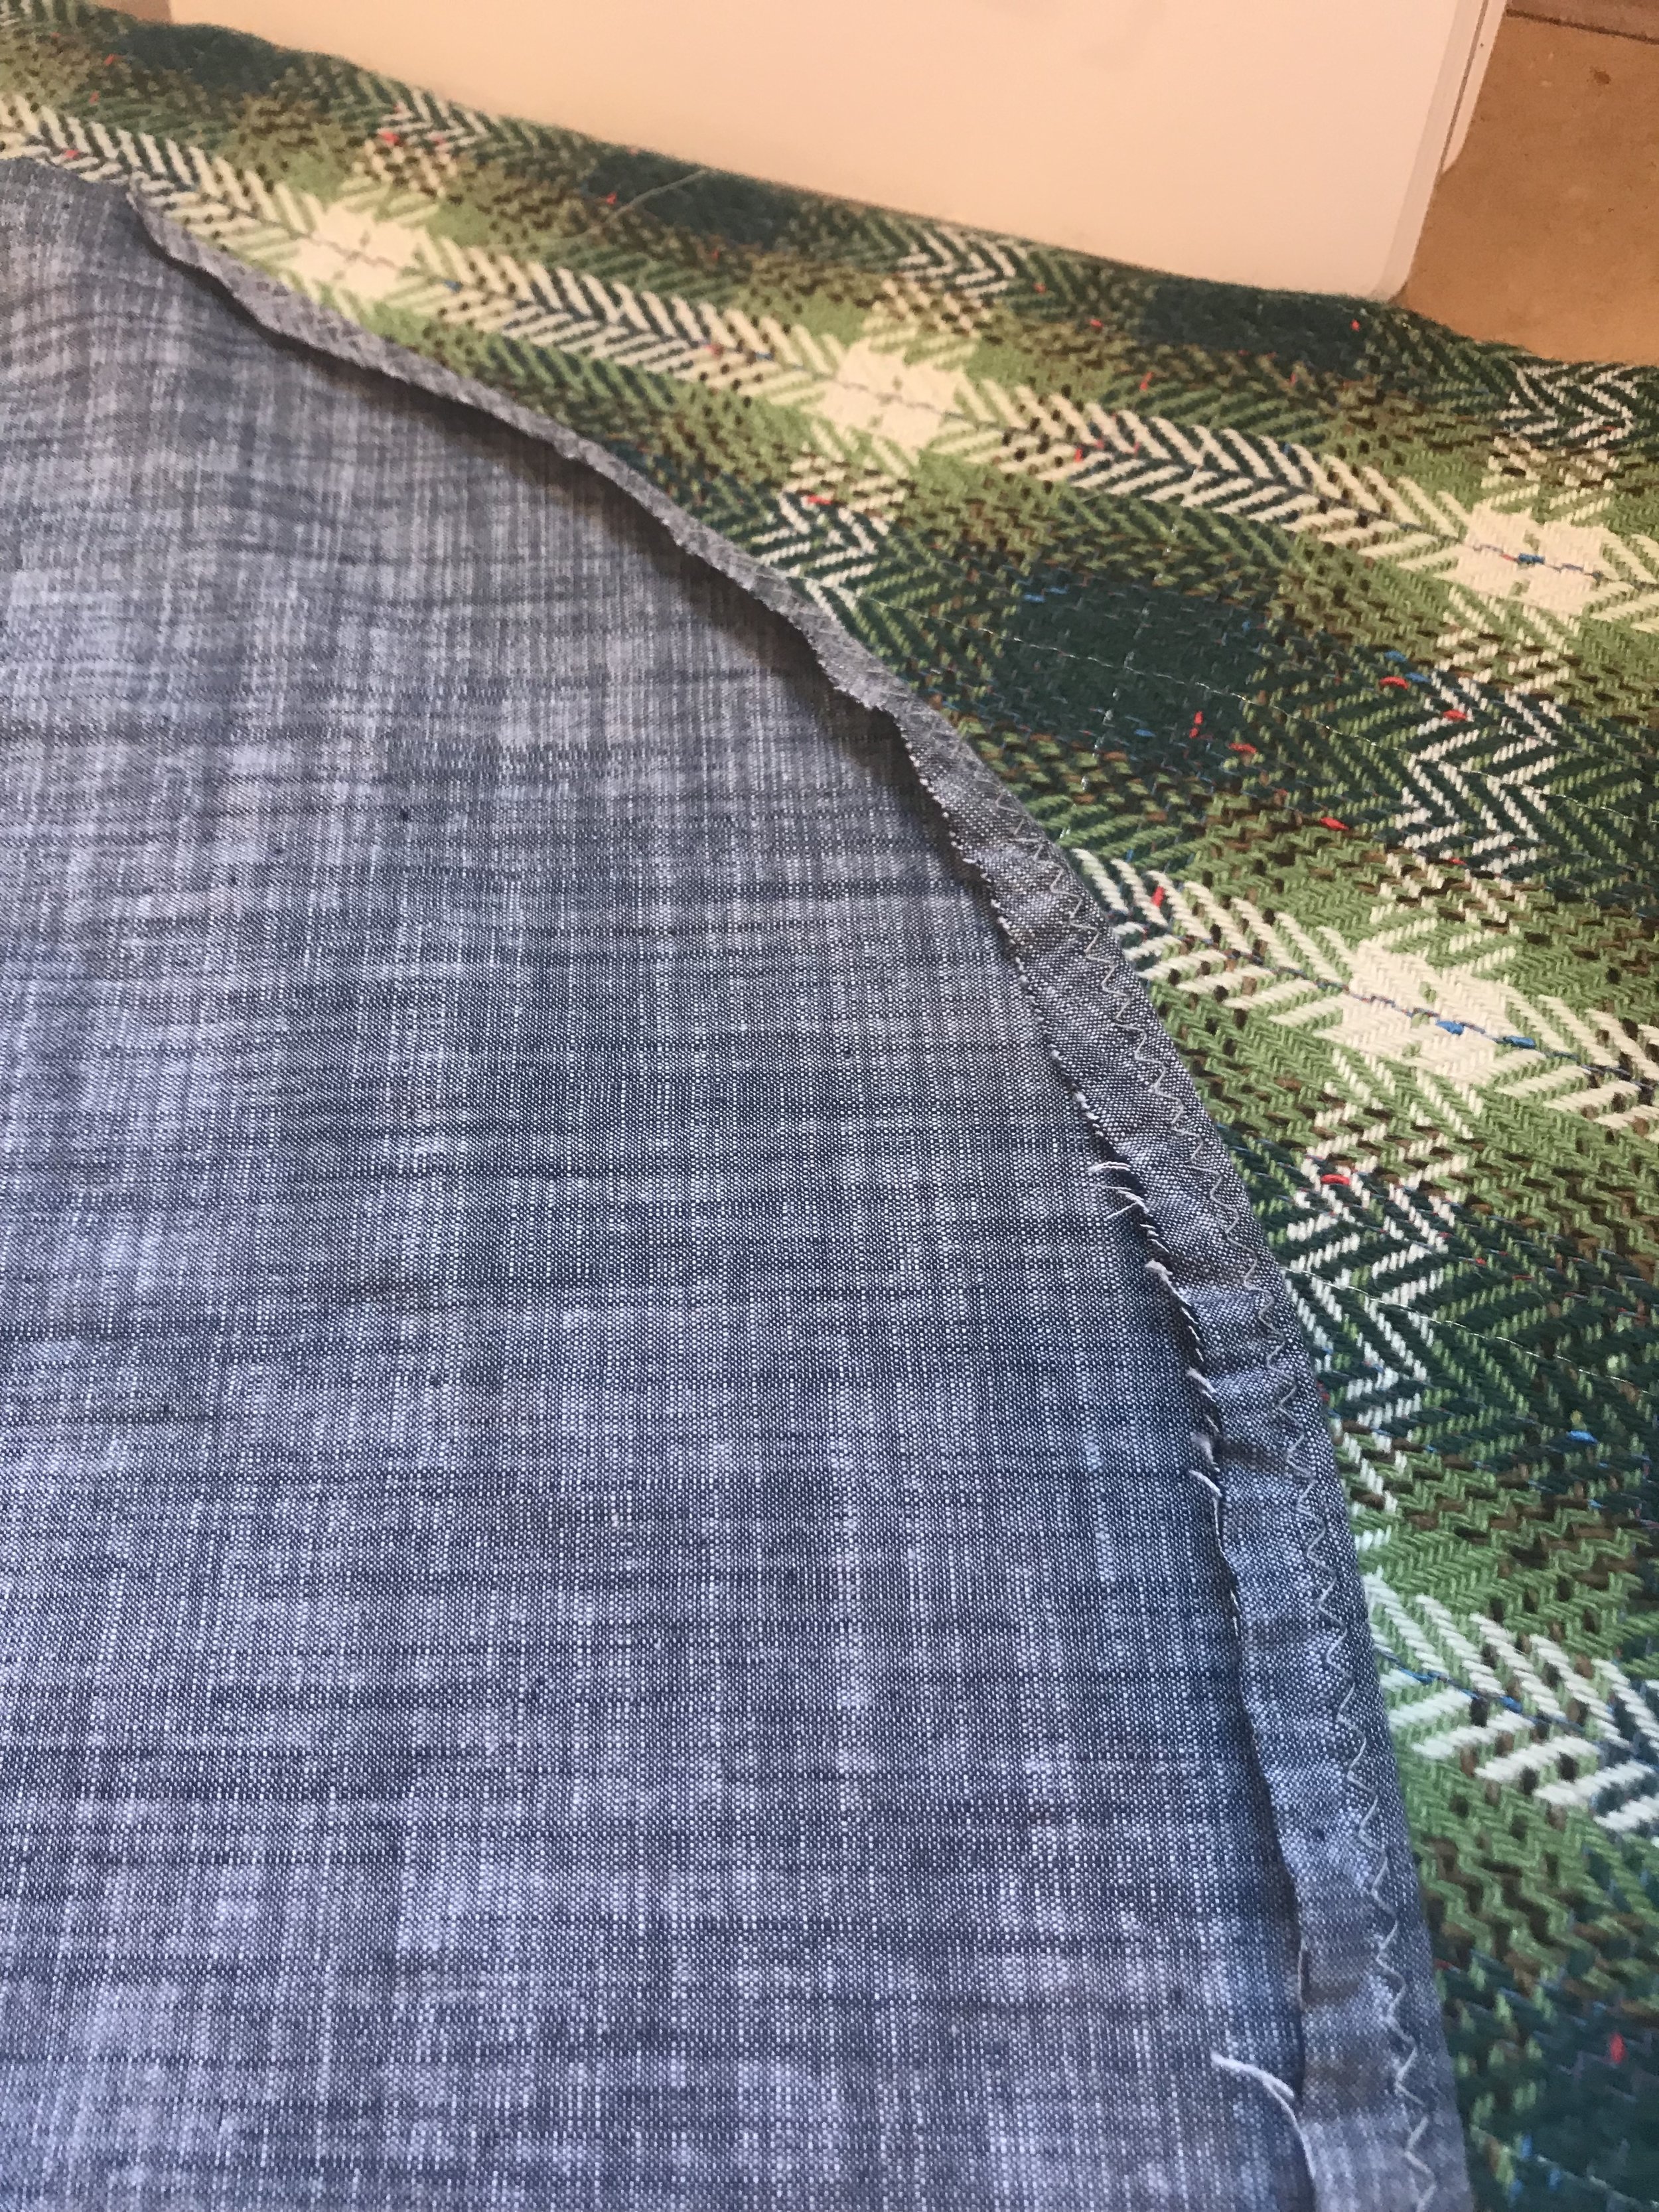
Look at all those beautiful glass-headed Merchant and Mills pins!

The front dress panel with yoke affixed, seam allowance pinned.
The next step is to put on the yoke - you know, the thing that goes over the shoulders of the dress and/or dress shirt to create a smooth line across the shoulders and connects the sleeves.
PATTERN TIP: The tricky part on this particular pattern was that the yoke has slightly more fabric over the shoulder seam than the dress panel, and the pattern isn't super clear where to put it. Should it fall to the outside (sleeve side)? Or inside (neck side)? For future reference IT GOES ON THE INSIDE!
(I made this mistake and unpicked the pattern and resewed it. Thankfully, the seams were short and I love working with the fabric, so whatever you do with it is fun. It goes on the inside because that way when you sew the back neck seam together, it makes a perfect little line with the front neck.)

See? IT GOES ON THE INSIDE!
Next stop on our Merchant and Mills journey: putting in the back panel. Not hard at all, and I learned a new technique for gathering. This is probably an old technique to everyone else, but if not, let me tell you and future me about it!
You put your stitch at it's biggest/widest, then, sew two lines of stitches. For the first row, you backstitch on one side; for the second row, you backstitch on the other. This way, you can pull from either side creating gathers. Thanks for the info, Merchant and Mills! #neverstoplearning
After putting together the back panel, they have you hem both sides before sewing together the side seams, which seemed a bit odd to me, until I realized that they really do rely on good engineering to ensure that everything works. Trust them - if you hem to the right 5/8" seam allowance, all really will be well.
One issue I have when hemming is inside curves - they can be tricky because of the fabric's wont to gather and rebel, unfolding on inside curves. I used the iron on a light steam setting to see if I could shrink the inside curve hem fabric, and IT WORKED!!! I'm so excited. This was one of the high points of my day. I'm curious to try out more shrinking of ease with iron vs. gathering. Reading through a couture sewing techniques, I hear it's quite the thing - but takes a long time.
Practicing steaming my curved inner seams.

Iron on light steam setting.
I was really worried about the sleeves because sleeves aren't my forte - but I was really pleased that with a little care, the sleeves weren't hard at all. I got to polish up my gathering again for the ease on the top curves, and decided on the longer length of the sleeves, which goes to about the elbow on my very long arms!
The End
I'm SO pleased with how this dress turned out. It's in weekly rotation and I LOVE it. I get compliments on it all the time, and every time I wear it I feel super cool and unique (because that's just how Merchant and Mills makes you feel.)
Here I am, enjoying the dress in front of my fireplace!

Full length, head-on Merchant and Mills beauty.
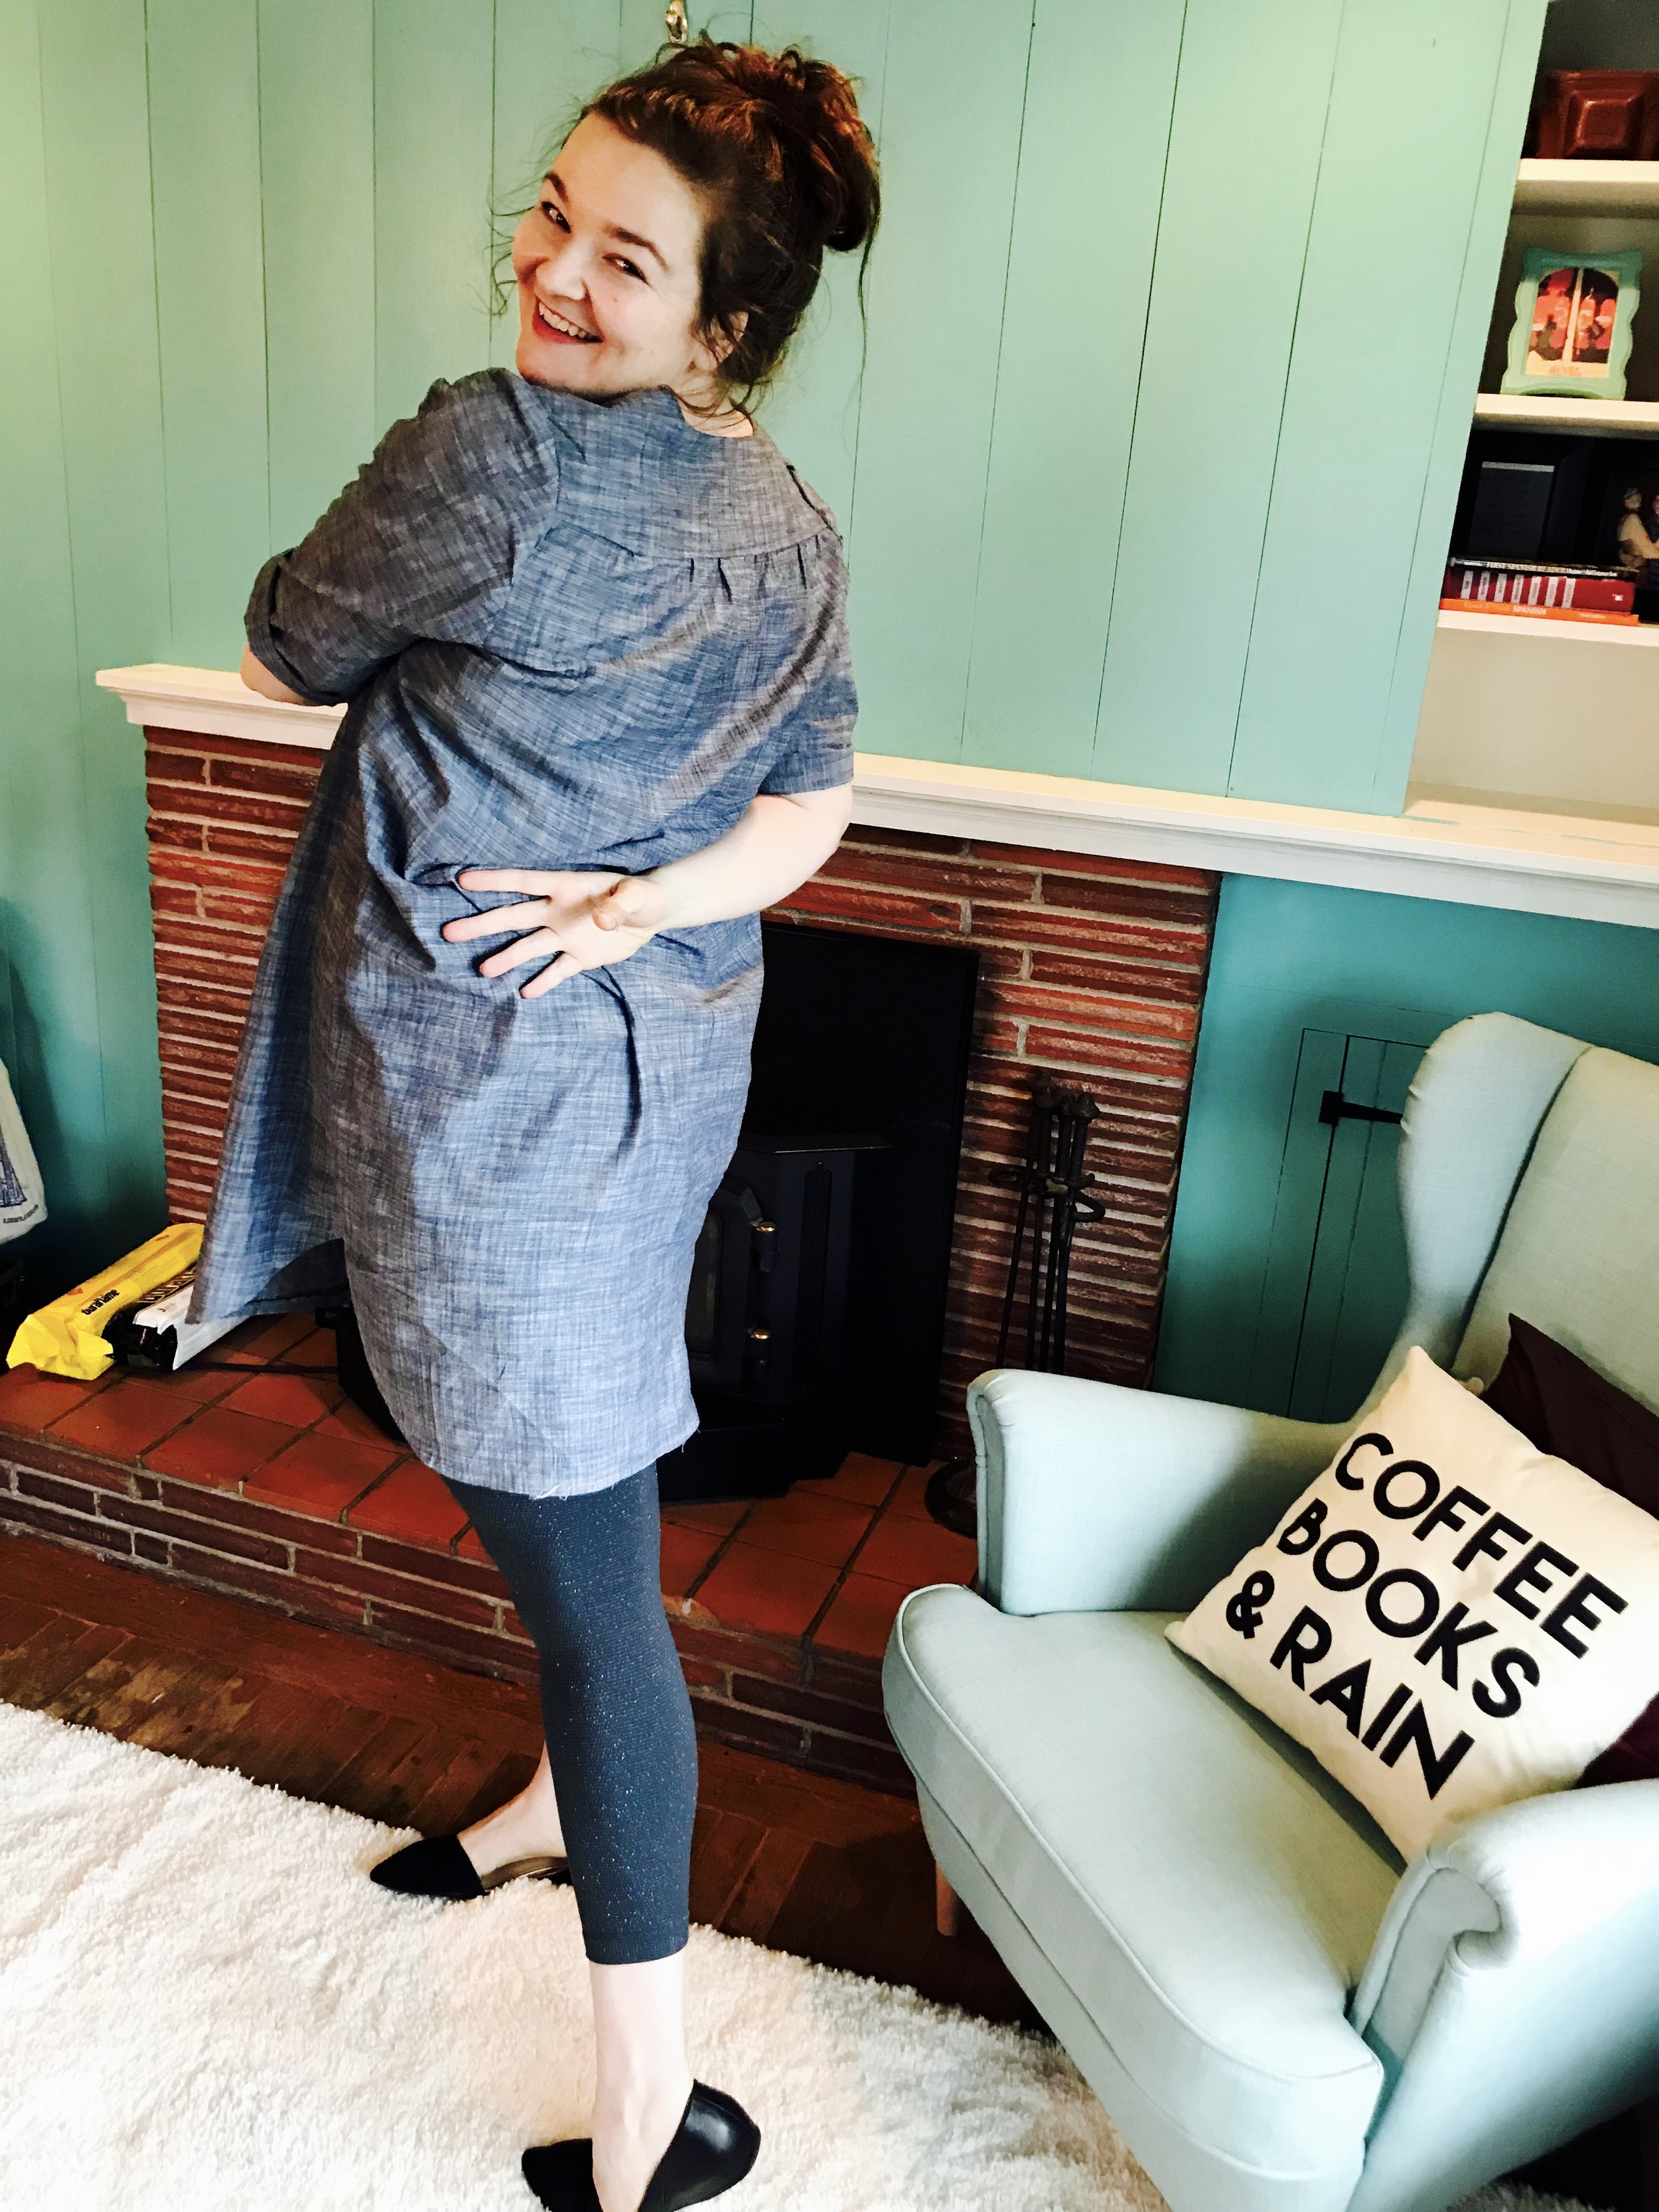
With a twirl.

Rolling up my sleeves. Because I CAN!

Hello!
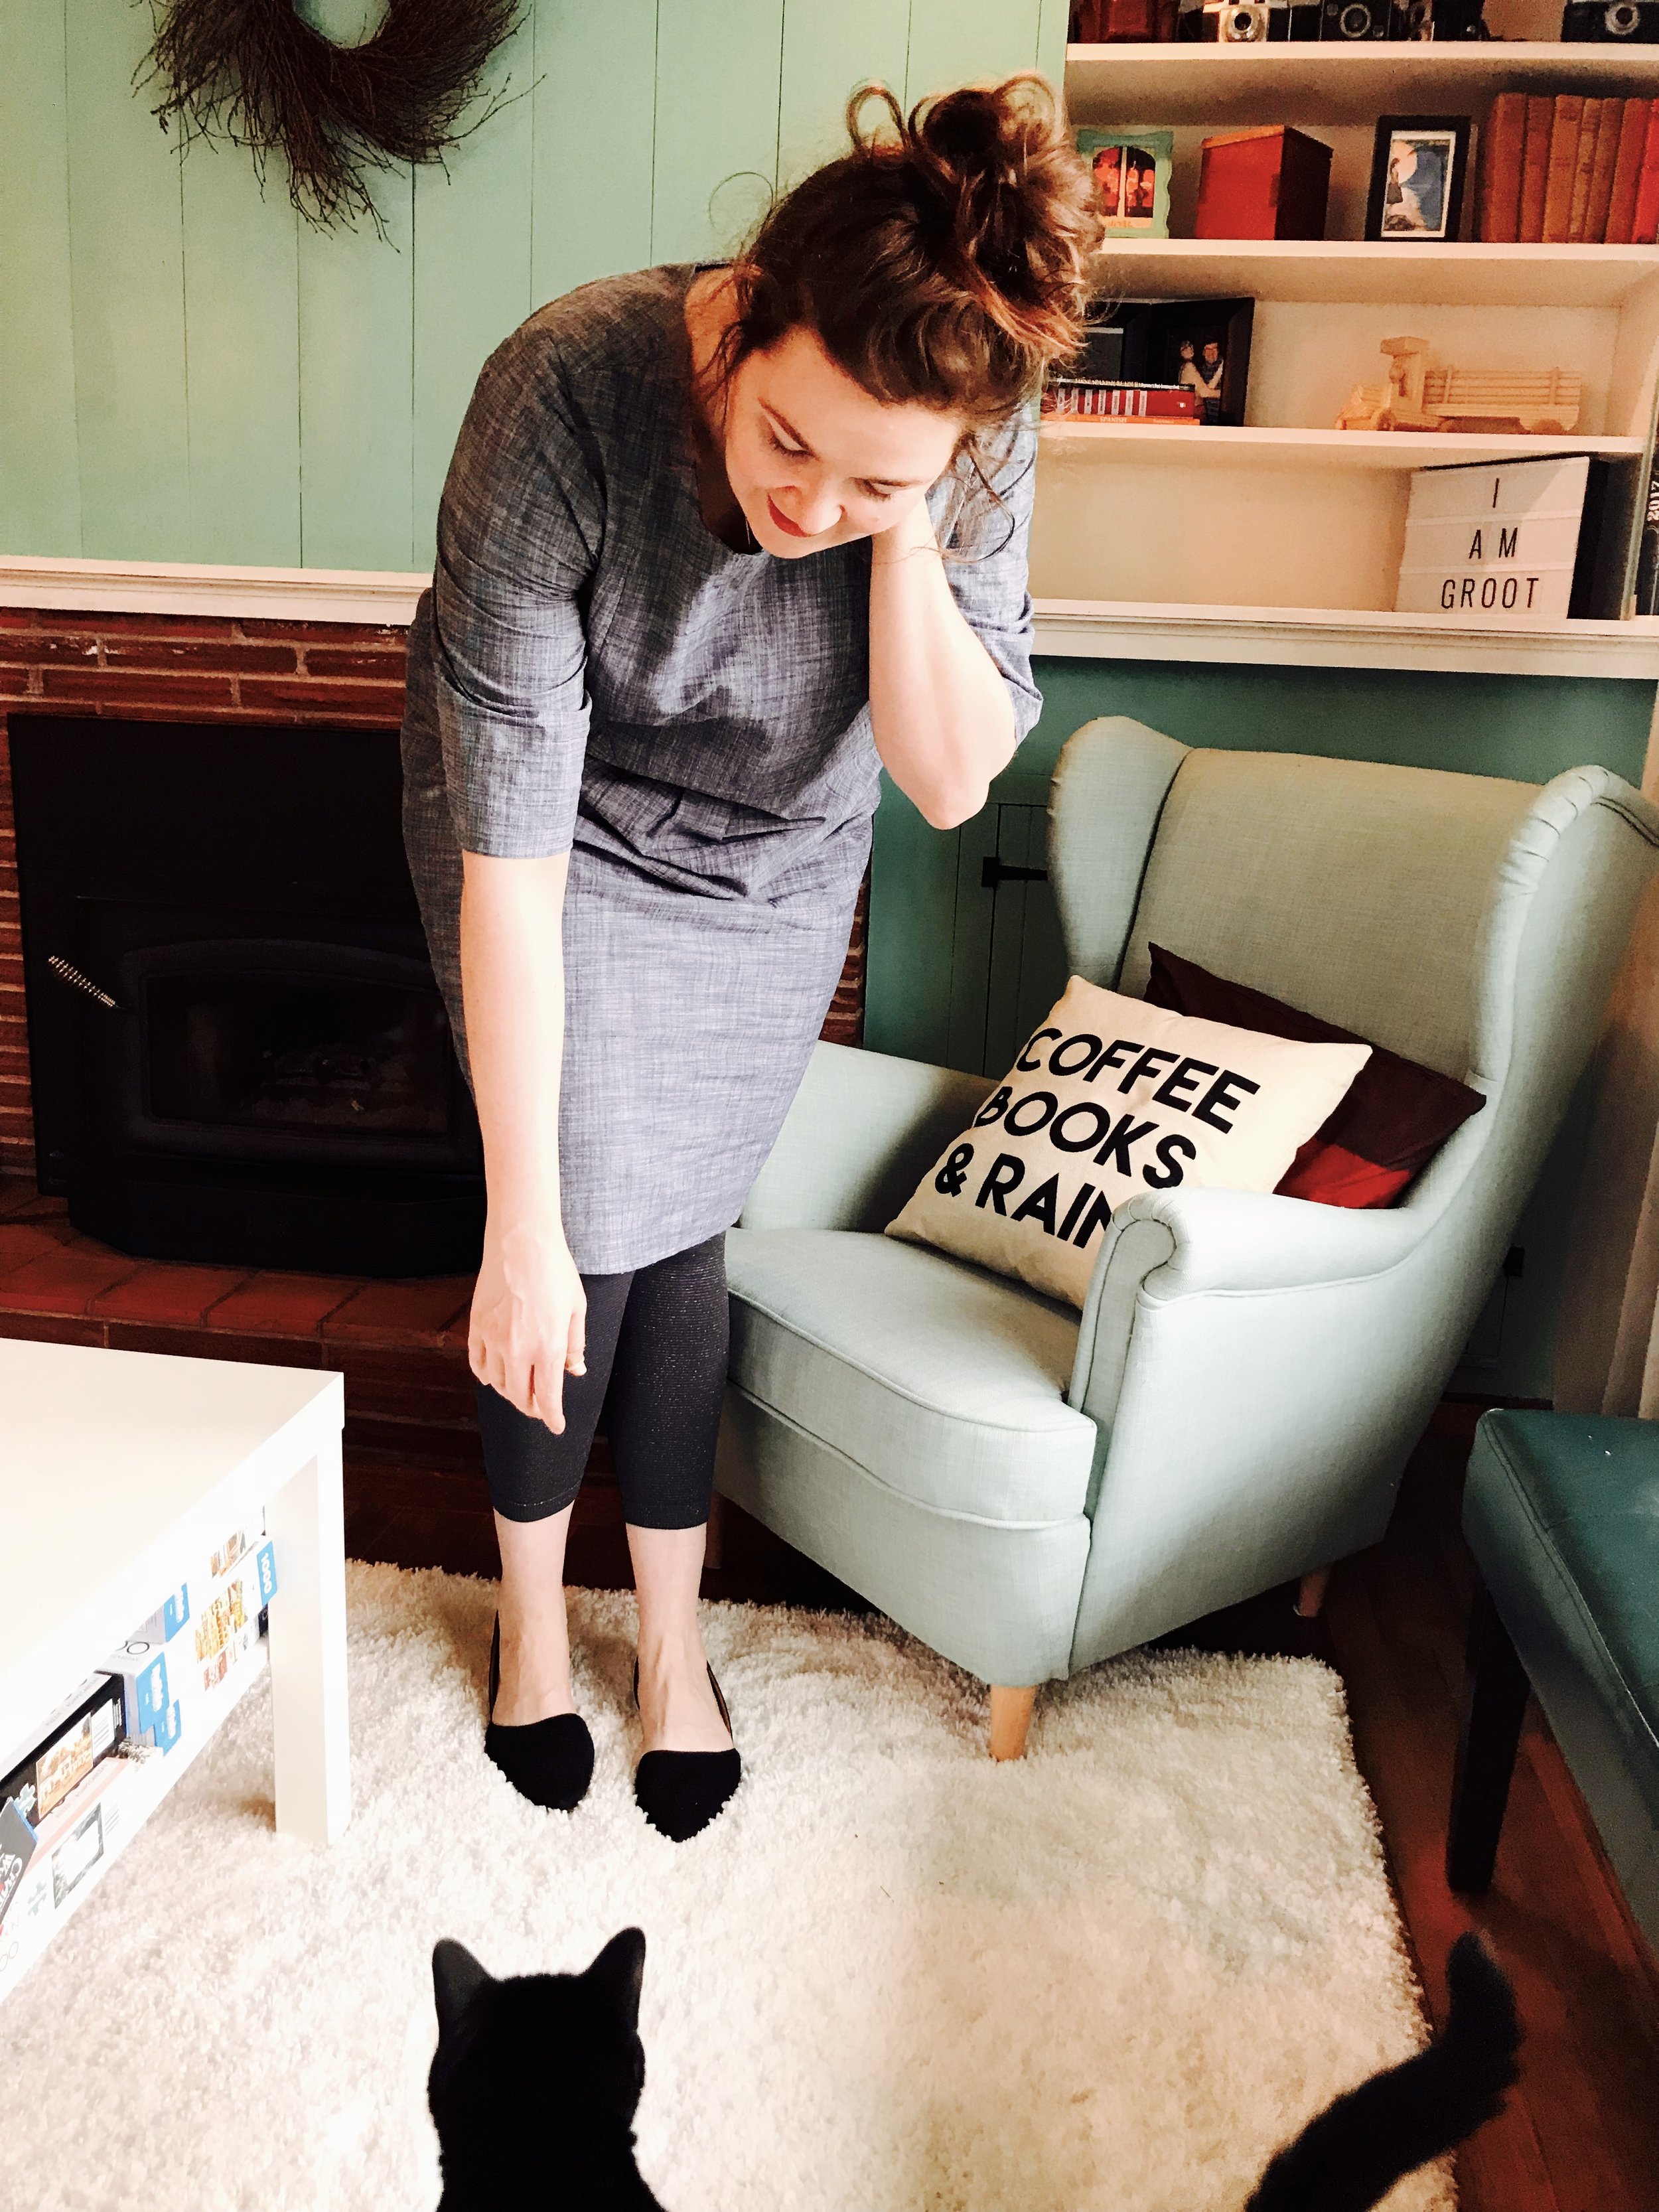
Kitty!